Saturday, August 6, 2011

More cards

We've had a few birthdays and an engagement party recently - here are the cards I made:

Engagement card -


Cardstock: Pear Pizzazz, Whisper White, Chocolate Chip
DSP: Greenhouse Gala
Stamps: Love Owl-ways, Cute By the Inch
Punches: 1 3/8" and 1 3/4" circle punches
Ink: Pear Pizzazz, Real Red and Garden Green markers
Whisper White Ribbon

Birthday Cards -


Stamps: Flight of the Butterfly, Dream Wheel
Cardstock: OHT sheets (instead of window sheets), Lovely Lilac and Pixie Pink cardstock (now retired), Whisper White
Ink: Melon Mambo, White Staz On
Dazzling Diamonds Glitter, Scallop Square Die


Top Note die
Cardstock: Riding Hood Red, Kiwi Kiss, Whisper White
DSP: Bella Rose (retired)
Punches: 1 1/4" Square punch, Word Window punch
Stamp: Sweet Birthday
Kiwi Kiss Satin Ribbon, Brads


Square Lattice embossing folder
Circles #2 die
Punches: Two Step Bird, Oval and Large Oval punches
Stamps: Sweet Birthday, Punch Potpurri
Cardstock: Bashful Blue, Whisper White, Certainly Celery, Chocolate Chip
Bashful Blue Ribbon

Initial Wall Art Tutorial


I made some wall art for some of my nephews recently, and decided to share how I did it :-)

You will need:

12" x 12" framed canvas (I picked up mine from Big W for about $5)
Sheet of Scrapbook paper
Mod Podge
Acrylic Paint - I used black and white
Assorted paint application tools - I used a roller, a paintbrush and a foam brush for the Mod Podge
Craft wood Letter (I found mine a Lincraft during a sale, they have them at Bunnings too)


Step 1 - Paint the top and edges canvas - I painted mine black as I was using dark colour scrapbook paper. If using a light colour you could just leave it white or paint it a matching colour. Here are my assistants painting the canvas ;-) Tip - Using a roller gives you much more even coverage.


Step 2 - Paint your letter. I used white to paint my letter. Again you can choose whatever colour you like. I had to give mine a couple of coats to get it looking nice.


Leave both the canvas and the letter dry for a couple of hours.

Step 3
Attach your scrapbook paper to your canvas with Mod Podge.

Allow the first coat to dry. Try to remove as many bubbles as you can!

Step 4

Cover the canvas and paper with a coat of Mod Podge. Don't forget the sides!

Allow time to dry.

Step 5

Use the Mod Podge to glue your letter into the centre of the canvas


Again, allow time to dry.

Step 6

Finish with another coat (or two) of Mod Podge all over, allowing drying time between coats.


And there you have it! A nice, simple decoration for a boy's room :-)

Thursday, July 7, 2011

The Buttercup Bag and Gathered Clutch Purse

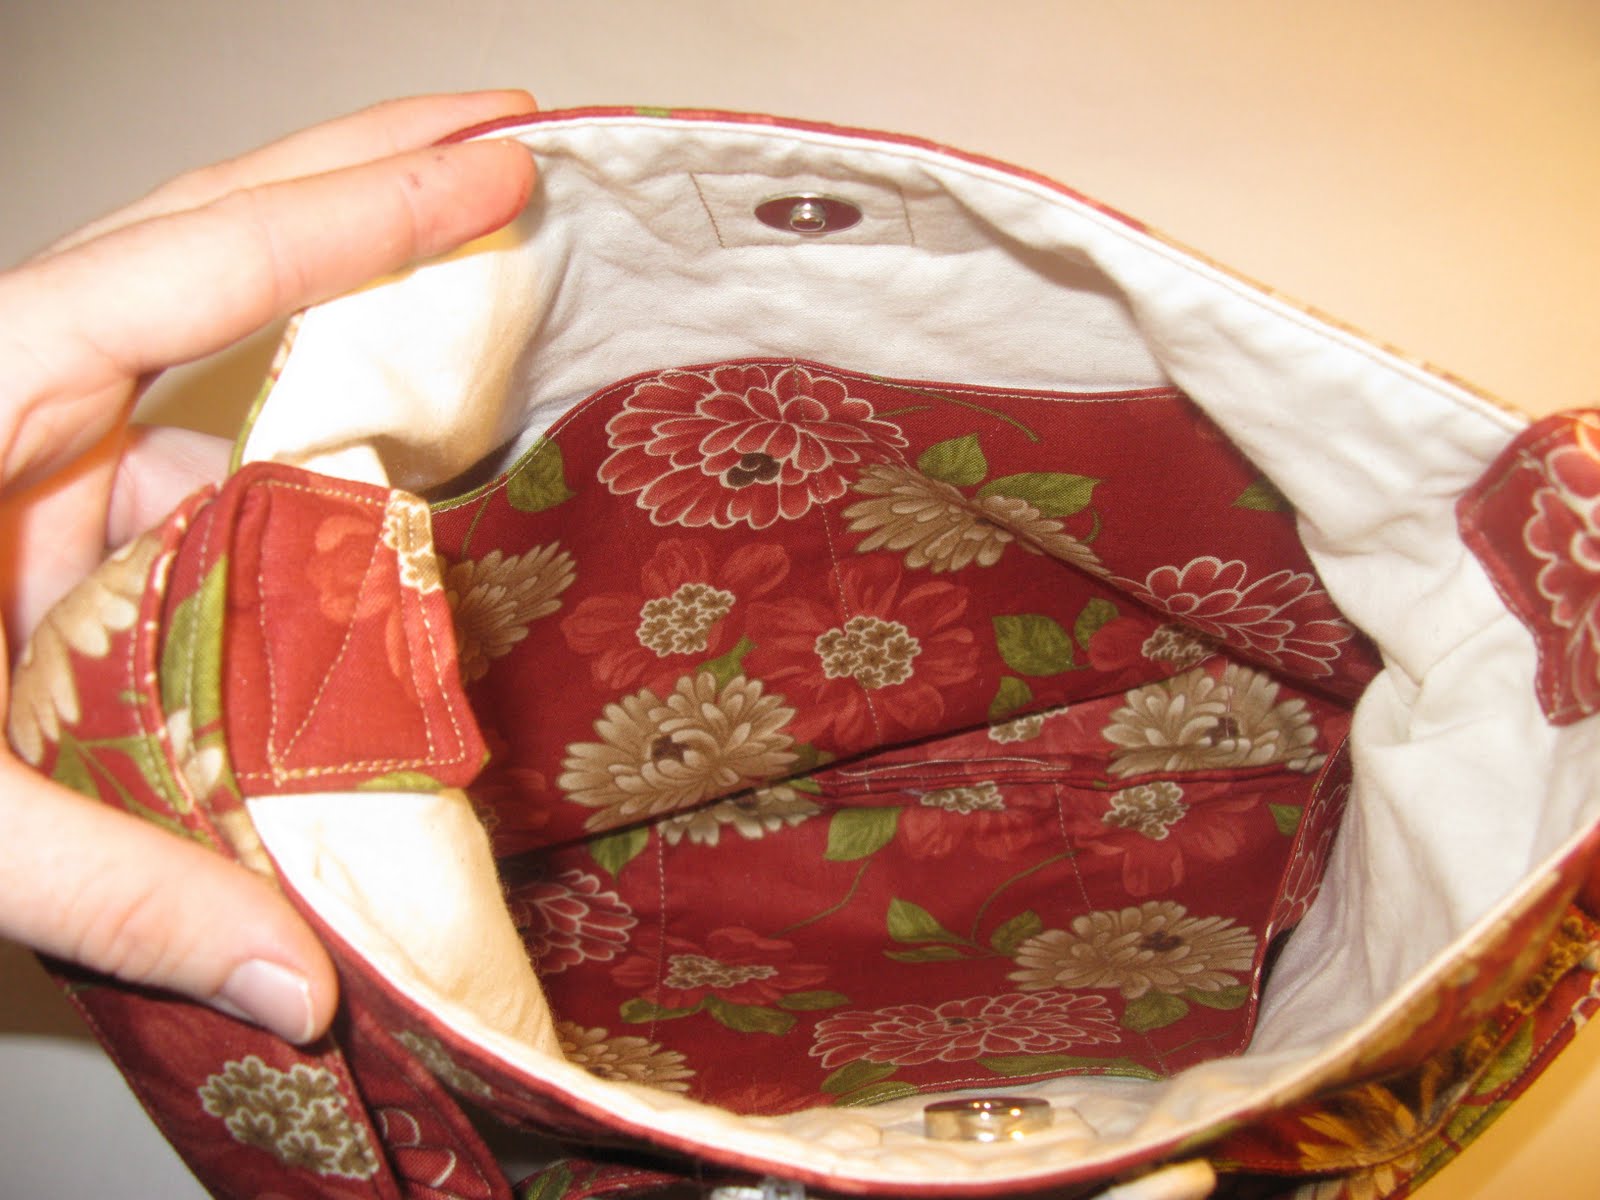
My cousin recently celebrated her 30th birthday, and after finding out from her husband that she would appreciate "something handmade, natural, green or crafty" I decided to try a couple of tutorials that I'd been wanting to try for a LONG time :-) I found some beautiful Moda Cotton Blossoms fabric in a Oz Material Girls online sale (unfortunately it appears Moda doesn't make this fabric any more) and some contrasting fabric in (of all places) Big W!

The first tutorial I used was the Buttercup Bag pattern from Made By Rae. I enlarged the pattern using the instructions in this post and I left off the button tab - I just sewed the buttons on to the outer layer. I also added some extra pockets on the inside. I also made the strap adjustable.


The second tutorial I used was the Gathered Clutch tutorial from Noodlehead. I must admit, I did find the zipper tabs in this tutorial a little tricky to do (my zipper foot and I don't get along very well) but I managed it in the end. I also added an extra pocket on the inside again (you can never have too many pockets in a handbag - well, that's what I think anyway)


These were quite quick and simple (well, except for the zip tabs) to make - I managed to make these over a couple of days while the kids were either eating or sleeping. I'll have to make some for myself now!


Tuesday, July 5, 2011

Make it Perfect Afterglow shirt


Sorry its been so long since posts! I've been so busy crafting (and with life in general) that I haven't had time to blog!

Anyway, one of my nieces recently celebrated her 5th birthday. I had been eyeing off the Afterglow pattern from Make It Perfect for a while and luckily The Oz Material Girls had it on sale! I found some material from my stash (I'm pretty sure my mum had used the same material to make one of my sister's a dress when she was only about 3 or 4 :-D), and voila!


The pleated detail is a bit hard to see in this photo (sorry, it was taken in the afternoon of the night before the birthday...). I shortened the pattern to shirt length, and added a pleated frill on the bottom. Below is the picture from the front of the Afterglow pattern so you can see the pleating around the neckline a bit better - I think mine turned out ok :-)


Hope the birthday girl liked it!

Friday, June 24, 2011

This speaks for itself :-)

Image from JenniSparks

And explains why I can find time for crafting... but have a messy house :-)

(You can download the image from here)

Friday, June 3, 2011

Cars 2 is coming :-)

A definite non-crafty post today!

We're all Disney movie fans in this house. And the Cars movie is a definite favourite around here! I think my favourite character would have to be Mater :-) My eldest boy loves Lightning McQueen - wandering through Spotlight recently he found a Lightning McQueen pinata and has told me that we need to buy it for his birthday party (his birthday is not until January so he has a bit of time to wait...). Did you know that Cars 2 is coming to theatres on June 23? Here's the trailer:


I can't wait to take all my boys (and myself) to see it :-)

Would you like to win your own family pass to see Cars 2? Check out this blog for your chance to see Cars 2.

Tuesday, May 24, 2011

The Bapron

What is a Bapron? Simply, a baby apron :-) I found this tutorial on Craftiness is not Optional the other day, and thought it would be perfect to make for my 1 year old, who insists on feeding himself :-) It has more coverage than your average bib, and is a little harder for Mr 1yr old to take it off. I used a plastic "table bib" that my dad had picked up somewhere for free and cut it up to make this (and 3 other baprons). I lined the back with a "vintage" sheet (ie I picked it up from an op shop), and made my own bias tape using a Birch bias tape maker I received for my birthday (an awesome sewing tool). The tutorial uses fabric and flannel for their baprons, but I wanted something I could wipe clean (and could keep off beet root stains!). Oilcloth or any other laminated fabric would probably work well too.

And here's an action shot :-)


Monday, May 23, 2011

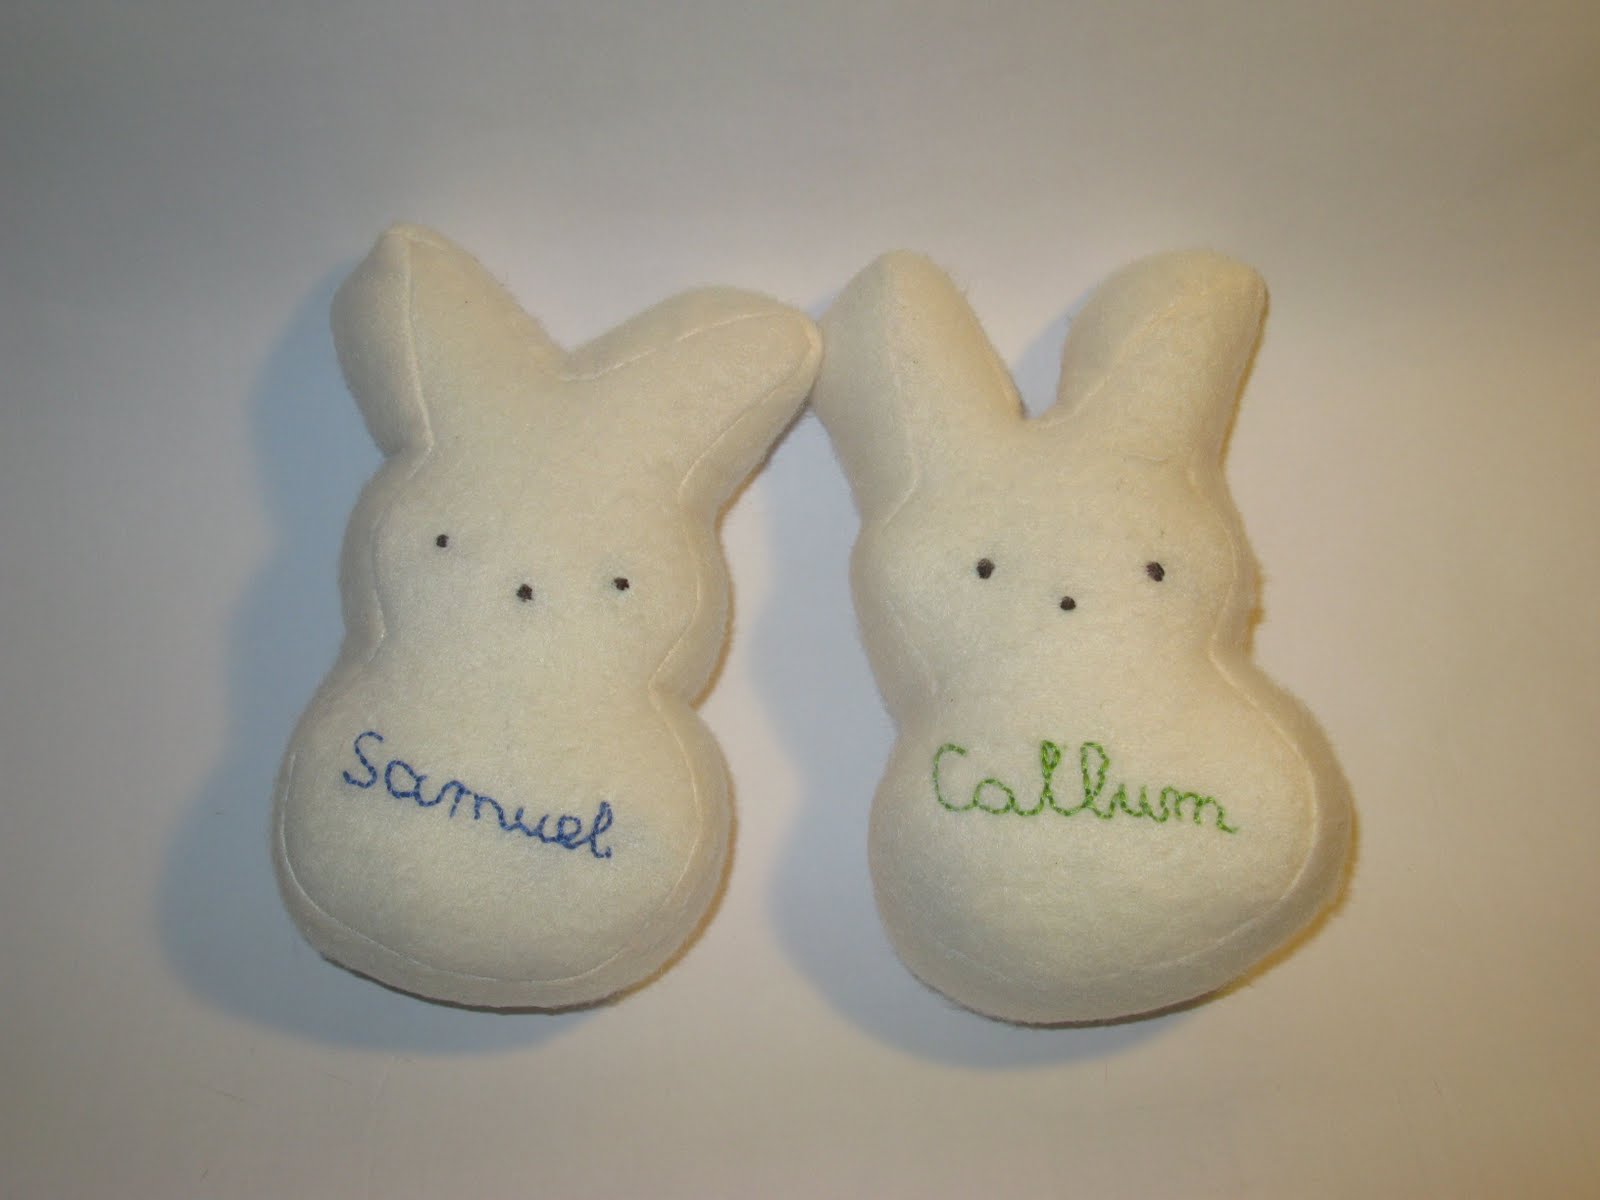
Easter bunnies

I know its a while after Easter, but this little Easter bunny has been a little slow to take photos...

I saw quite a few versions of this tutorial before Easter, and decided to share the marshmallow bunny love with my two boys.

I ended up using a cream fleece remnant I thrifted from my mum's stash. I learned a couple of things... firstly to draw a line when doing embroidery so that the words are straight... and pinning is essential to keep everything straight. I was rushing to get these done before Easter and so I left out the pinning. But they turned out quite good (albeit a little twisty) and the boys love them, which is the most important thing!

Sunday, May 22, 2011

Champion Cargos - pattern by Make it Perfect

My boys both recently needed new pants to wear to church, so I pulled out the Make it Perfect book that I received for Christmas and found the "perfect" pattern - the Champion Cargos pattern.

The first pair I made were in an olive coloured drill that I had managed to snag on clearance at Spotlight one day. These are size 3.


The second pair I've just finished are in a size 0 for my 12 month old (and there is plenty of room). I made these using some corduroy I picked up at an op shop. I probably wouldn't make these pants out of cord again (unless maybe it was a microcord or something) because when it came to sew the waistband I was sewing through 4 layers of corduroy at the pockets and my sewing machine didn't particularly like it, even when using my denim needle.

I love how these turned out - and how they look just that little bit dressier without having to try and figure out how to do a zip fly!

Saturday, May 21, 2011

A few more cards...

We've had a few birthdays recently in the extended family. Oh and Mother's Day :-) Here's my latest card-making attempts:


Got Treats stamp set, Melon Mambo, Whisper White and Basic Black cardstock, Cupcakes wheel, Versamark and Melon Mambo ink, Rhinestone Brads, Dazzling Diamonds glitter and gingham ribbon I picked up at my local scrapbook store (which is now unfortunately closed)


Occasional greetings stamp set, Dinosaurs die set by Cuttlebug, Bold Brights assorted cardstock (retired), Crystal effects.

Dragon stamp by Snag 'Em Stamps, Crazy for Cupcakes stamp set (for greeting), stars embossing folder, Dazzling Diamonds glitter, Bold Brights markers and cardstock, Staz On ink.


I know black, red and white is a bit unusual for a mother's day card, but I really like the way these turned out.

Basic Black, Whisper White and Real Red cardstock, Real Red and Garden Green markers, Real Red and Basic Black ink, sponges, Square Lattice embossing Folder, Pocket Silhouettes and Occasional Greetings stamp sets, Riding Hood Red taffeta ribbon (retired)