Wednesday, June 13, 2012

The tale of the three princess dresses


Once upon a time, three little girls were invited to a princess party. Alas, they had no princess dresses to wear to this princess party. So a good fairy decided to try and make some dresses for these three little girls. The good fairy only had 3 days to make these dresses, and so she raided her stash for some suitable fabrics and trimmings, and got to work. Many doubts entered the good fairy's mind as she worked on the dresses - how was she ever going to get them finished on time. However, luck was on the good fairy's side, and with a few hours to spare, the dresses were completed. 


 And the princesses lived happily ever after ;-)

Sunday, June 10, 2012

Baby Shower gifts

I went to a baby shower a couple of weeks ago for my husband's cousin's wife, who was only a couple of weeks away from having her first baby - a little boy. I was able to get crafty and put together a few things for the new arrival.


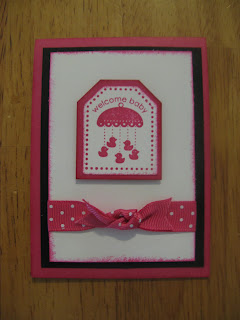
Card: Stamp set - Baby Prints and Nursery Necessities
Cardstock - Whisper White, Pacific Point and Kiwi Kiss
Ink - Pacific Point and Kiwi Kiss
Other: Oval punches, Polka Dot embossing folder

Tie Bodysuit to wear to church:


Newborn Snuggler from the Lotta Jansdotter book - Simple Sewing for Baby. Its a simple swaddling cocoon for a new baby. It's made from cotton fabric on the outside and minky on the inside to keep the baby warm.

(I also made one of these for my baby...)  


A quick crafty overview of the past few months...

I've been suffering from crafting ADD the last few months - I start a project, only to stop and start another one, and so on and so on. Plus the baby creating and working and two other little boys have left little time/energy for finishing things. And then there is the whole taking photos/blogging of the actual finished projects :-) But here are a few things I have been able to finish:


A baby girl outfit for a friend's baby shower. This is a combination of the Little Lizard King "Elizabeth Claire" pattern, a scalloped skirt tutorial and the "Diaper Cover" pattern from MADE.

A card to go with the baby outfit:

Toys for my boys - This is the Kinder Boys pattern by Ric-Rac (I haven't quite finished all the clothes for these yet...)

A MiniHoot using this tutorial


My youngest son's 2nd Birthday Cake (from Australian Womens' Weekly Childrens Cake Book)


3 zippered hoodies for my eldest son using Burda 9822

And the occasional card making - this is the mothers day card I made for my mum and mum-in-law.


Tuesday, January 17, 2012

Christmas Goodies

Warning: Picture heavy post...

So here's what "Santa" made for Christmas this year for some of the family members...


Top and skirt set for a 4 year old - the buttons and ribbon I used for trimming were actually from Stampin' Up (The free Ice-Cream Parlour bundle that came free during the year)


Ballet Neck Toddler dress from the "One-Yard Wonders" book - I made two of these for my 5 and 6 year old nieces:


Top and skirt - I can't find the tutorial I used for the skirt, but its very similar to this skirt here.


Shorts made from the Champion Cargos pattern by Make It Perfect:


The Junebug Dress by Craftiness is Not Optional:


A Mommy and Mia Apron from Sew Much Ado for my sister:


Kids Messenger Bag from One Yard Wonders:


A freezer-paper stencilled shirt for my brother:


And some Stick By Me goodies...

This one is a tile bought from Bunnings which I've stamped with Staz On in and Fifth Avenue Floral stamps from Stampin' Up. I had to be so careful not to smudge, but I'm really happy with how it turned out :-)

And a block set with the Stick by Me stickers:


And the biggest thing I learned from all this... if you want a handmade Christmas, you probably have to start in June! :-)


Monday, January 16, 2012

Birthday presents for the nieces

In the lead up to Christmas we have several family birthdays as well (from the end of November to the beginning of February we have 12 family birthdays from both sides). Here's what I made for the three nieces birthdays.

This first one was for a 4 year old. I found some shirts on clearance at Target for $2.86 (I bought some for my husband as well :-D), and intended to make a Shirt dress from MADE. However the material was a slightly thicker polyester and when I tried to make the shirred Shirt Dress the fabric didn't shirr that well. So I made a simple skirt instead, and took the pocket from the shirt to applique onto a plain white t-shirt. I've sewed up the buttons on the front of the skirt for modesty reasons :-) and added a broderie anglaise border to make the skirt a little more girly. The felt flower is cut out using the Big Shot.


The next set was for my little 1 year old niece. Its a simple shirred shirt and pair of shorts. I added a ruffle to the shorts to make them more girly.


The last dress was made using Simplicity 2320. One of my 6 year old nieces had been asking her mum for a "rainbow" dress, and I had this material left over from a trolley cover my mum made for me. I think it fits the bill of a "rainbow" dress :-)


Sunday, January 15, 2012

Getting ready for Sunday :-)

My boys needed new shirts for church, and after searching for an inexpensive white shirt for my eldest son I decided to face my fears of sewing a button-up white shirt and actually give it a go. (I've been having issues with my automatic button-hole foot... ending up with buttonholes that are way too big for the button and lots of unpicking...) And to my surprise, it turned out really well :-)

Then I tried making a tie using the toddler tie tutorial from Lil' Blue Boo. And things didn't go so well with that. As you can see, its a bit too long for my boy, I used an interfacing that was a little too thick so the tie is really stiff, and I didn't hand sew the top (I did the elastic version) so now the tie has pulled out from under the knot. Oh well. It only took me about an hour or so from start to finish to make the tie so I know what to do next time :-)


And for son No 2 I appliqued some tie shapes onto onesies - the easiest way to wear a tie :-)

Saturday, January 14, 2012

"Charlie" Pyjamas

Next up on the crafting catch-up is some pyjamas I made for my eldest son using the "Charlie Tunic" pattern from Made by Rae. I've used a couple of Rae's patterns now (the Buttercup Bag, the Big Butt Baby pants and now this one) and find them so easy to use. The only thing I had to tweak on these was that the placket was far too low on my boy - it reached almost down to his tummy. I've made it shorter on the short-sleeved version and it fits a lot better. Add some matching basic pants and ta-da - new rocket pj's for the 4 year old :-)


Saturday, December 31, 2011

Time flies when you're...

Well, its the start of a new year - I don't know about anyone else, but 2011 just went a little too fast for me! Looking back over this blog I finished so many craft projects in 2011, but I still have so many UFO's to work on :-) And after this week's sale at Spotlight... lets just say my sewing machine will be running hot in 2012 (hopefully!). I'm looking forward to it :-)

I can offer a couple of excuses for the lack of posting leading up to Christmas. The main one being that any crafting I was doing was most likely for presents. And the second is linked to my current "creating" project... Baby No 3 who will be joining us in July this year. I'm spent much of the lead up to Christmas (and Christmas itself) laid low with morning sickness, but I *think* its starting to ease off now, and I can resume crafting again.

Anyway, over the next few days I'll post a few things I completed in the last few months (so you don't get one HUGE post filled with lots of pics)

To start off - here's some sewing I completed for myself before I became sick... I needed a few more shirts that would hide my pre-baby expanding tummy - and they've come in very useful now that I have an excuse for getting fatter ;-)

The first two are variations on Simplicity pattern 2599 - inspired by the series on the Presser Foot blog of One Pattern - 7 ways. The pattern is a simple tunic pattern that I've altered a bit to give more room around my tummy. The first I added a yoke with gathering underneath.

And the second I added a fully gathered "skirt" to the bodice. I've found these shirts really flattering to my shape, and there is also room to grow a little bit more.

The third shirt is a pattern I've used several times before - Butterick B5356. The material this time was from a skirt my mother had HAND-SEWED when she was 13. I loved the material and I've actually received a compliment on my shirt from a total stranger. It's great how well the fabric has held up over about 50 years - and I hope it can last a lot longer :-)


Sunday, November 6, 2011

It's beginning to look a lot like Christmas...

Please excuse the big blogging break. I've been sewing and sewing and crafting in order to enjoy a slightly more stress-free Christmas. I had hoped to be finished everything by now, but I still have a few things to do :-)

Anyway, over the last couple of days I dusted off my Stampin' Up demonstrator skills, sorted through my abundance of cardstock and put together my own little stamp-a-stack of Christmas cards. It was a great time to catch up with friends and start on my own Christmas cards for this year. Here's what we made:


My favourite is definitely the last card with Mary and Joseph. I found the idea on Splitcoast Stampers and there is a tutorial with all the folding measurements on lavenderthoughts.wordpress.com.

Thursday, September 1, 2011

My first Printable


I've seen a few printables around in the blogosphere, and when a friend posted this quote on Facebook the other day I decided to have a go at making my own using the instructions from I am Momma - Hear me Roar. As you can see, its a pretty basic printable at the moment, but it leaves a lot of room for doing your own thing to it :-) As an aside, the reason I love this quote so much is because it accurately portrays both my husband and myself :-)